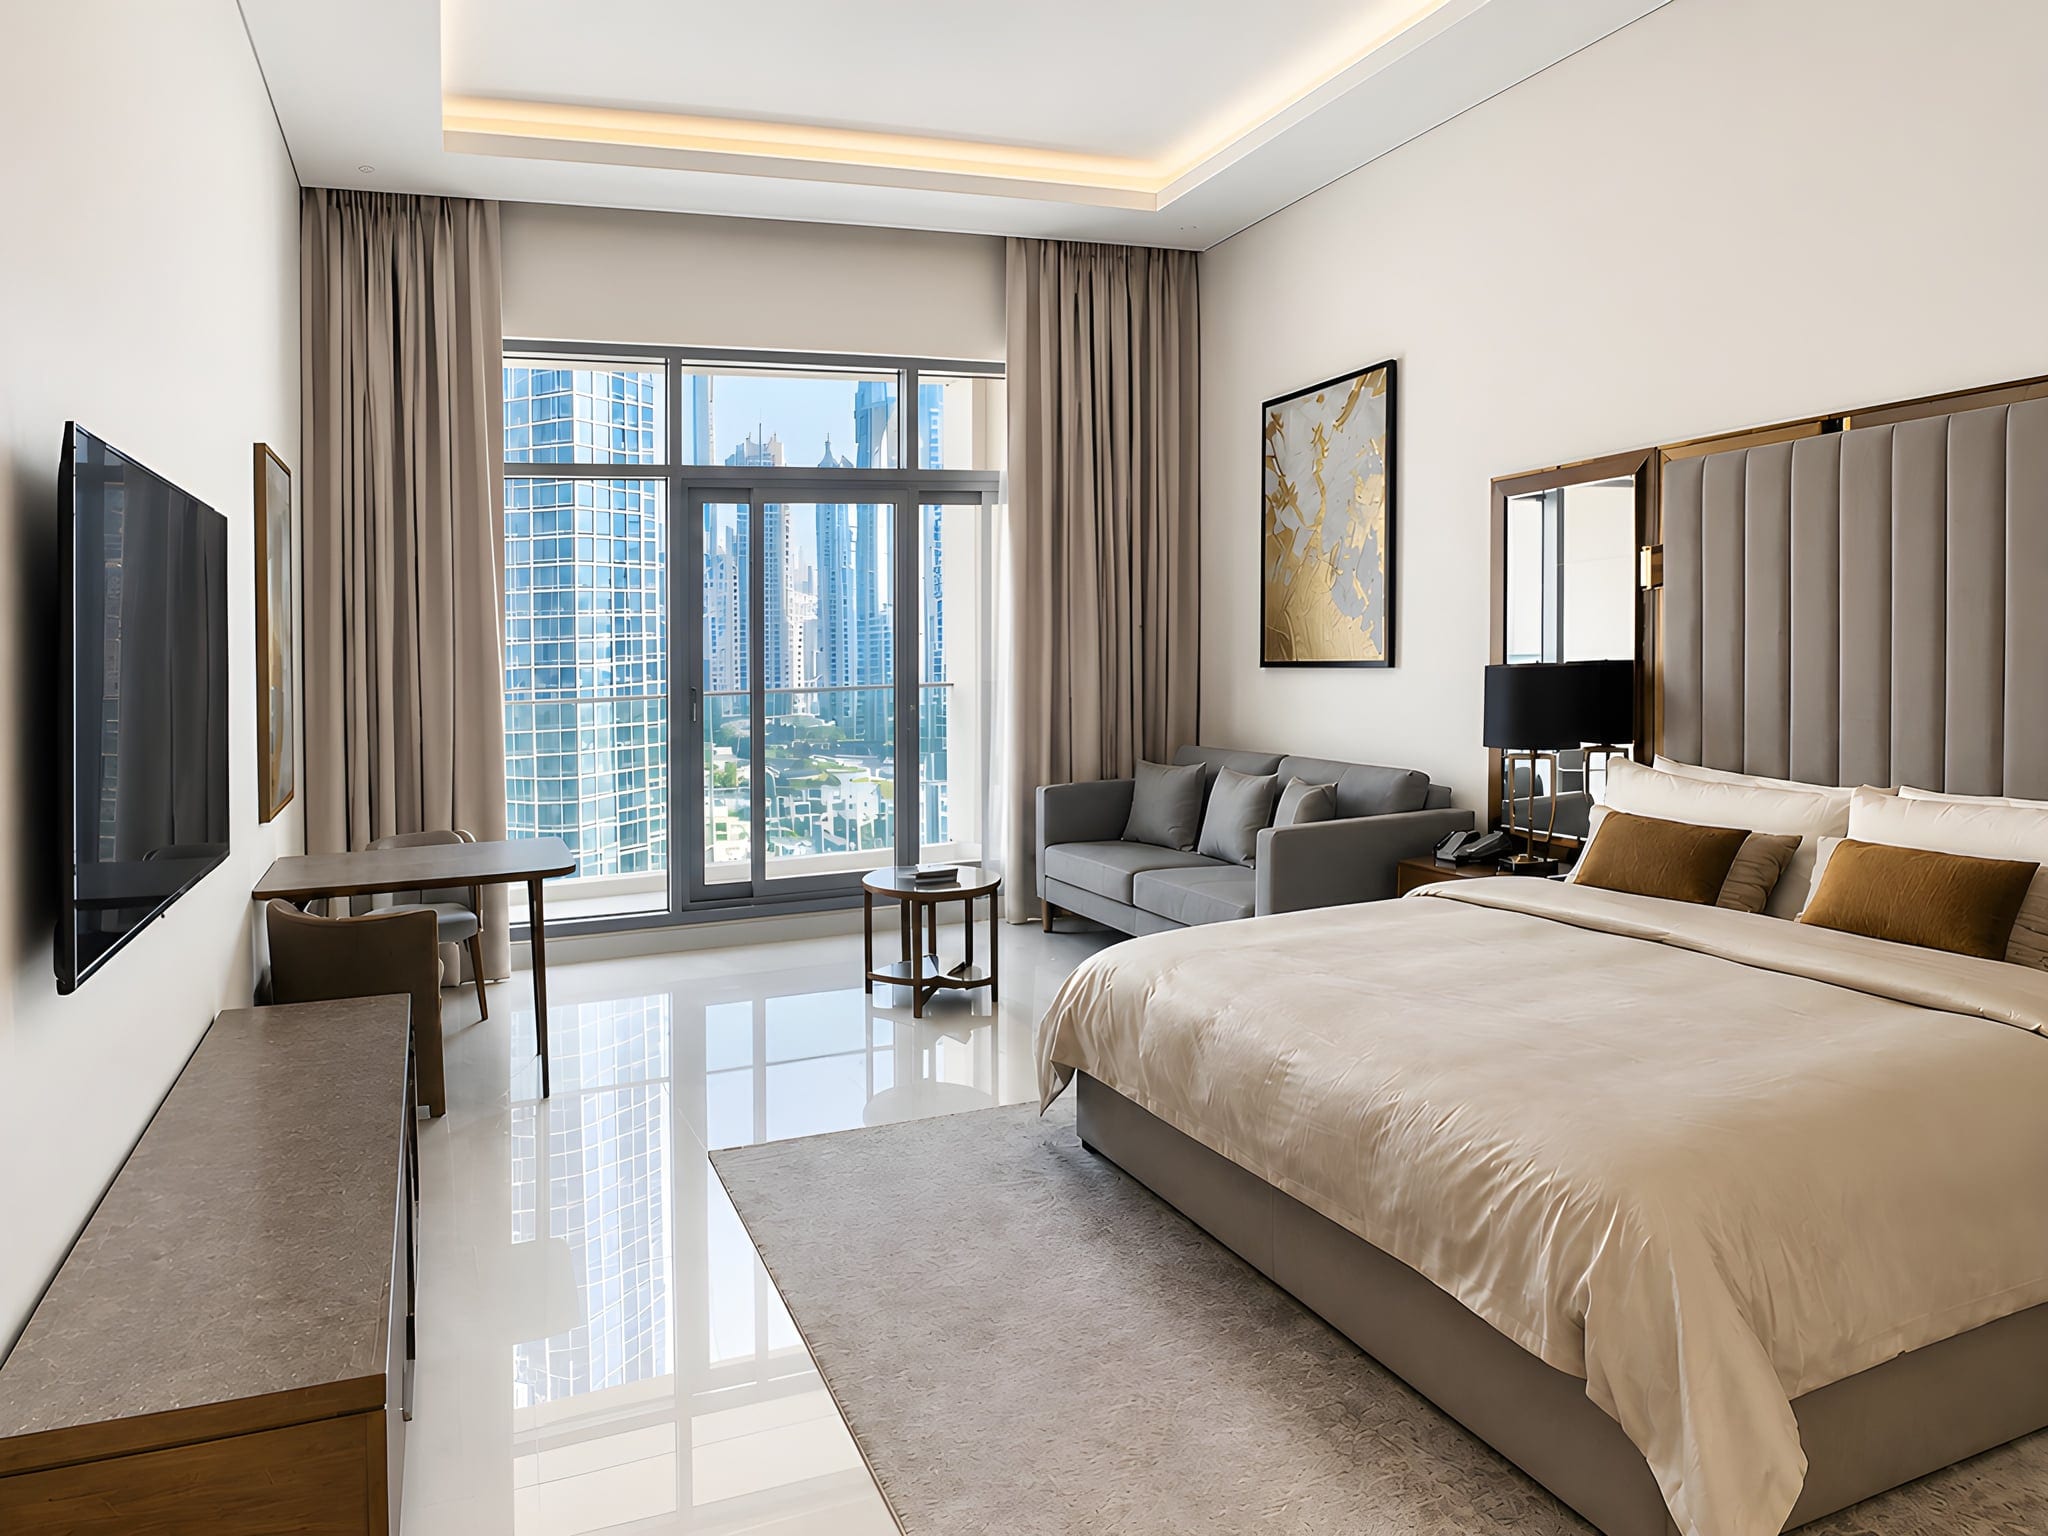
Point your camera at a living room with a sunny window and you have to pick a loser. Expose for the window and the room goes black. Expose for the room and the window blows to white. Your eyes see both at once; your camera, sadly, has commitment issues.
HDR real estate photography solves that. You shoot the same room at several brightness levels, a dark frame for the window and a bright one for the corners, then merge them into a single photo that keeps detail everywhere: clear windows, lit interiors, no black shadows or blown-out glass.
That is the whole idea, and it is why HDR is the default for professional listing photos across North America and Europe. The catch is the workflow: a tripod, exposure bracketing, and merging software, a lot of steps for a two-bed apartment that needs to go live today. This guide covers the full method, then the faster path for agents and DIY sellers on a phone. Both reach the same look; they just cost different amounts of your day.

What HDR Is and Why One Photo Cannot Capture It
HDR stands for High Dynamic Range. Dynamic range is the distance between the darkest and brightest parts of a scene, and a real estate interior has a brutal one. A window on a sunny day can be hundreds of times brighter than the shadowed corner behind a sofa. Your sensor cannot record both in one frame, so it forces a choice and you lose half the room.
Buyers do not care about sensor limits; they scroll past a listing where the windows are pure white voids or the rooms look like a cave. Real estate HDR photography fixes it by combining exposures so the bright window keeps its view and the dark corner keeps its detail, in one natural image.
HDR recovers a wide range of light, it is not a filter that makes a photo "pop". Done well, you cannot tell it was used; done badly, you absolutely can.

Why HDR Matters for Listings
The first photo is the listing. Most buyers decide whether to open it from one small thumbnail, and a dark or blown-out shot quietly buries a great home before anyone reads a word. A bright, balanced HDR photo wins the click, and HDR is the most reliable way to get there in interior real estate photography, where the window-versus-room contrast is harshest.
Listings with clean, professional-looking photography tend to attract more views and serious enquiries, and serious enquiries move a property. The National Association of Realtors' Profile of Home Buyers and Sellers research has long found that photos rank among the most useful things buyers look at online. You feel it on any portal: the bright listings stop your thumb, the dark ones do not.
For the fundamentals beyond HDR (framing, light, decluttering), our guide to real estate photography tips covers the rest of the shoot. HDR handles the light; composition and prep handle the rest.

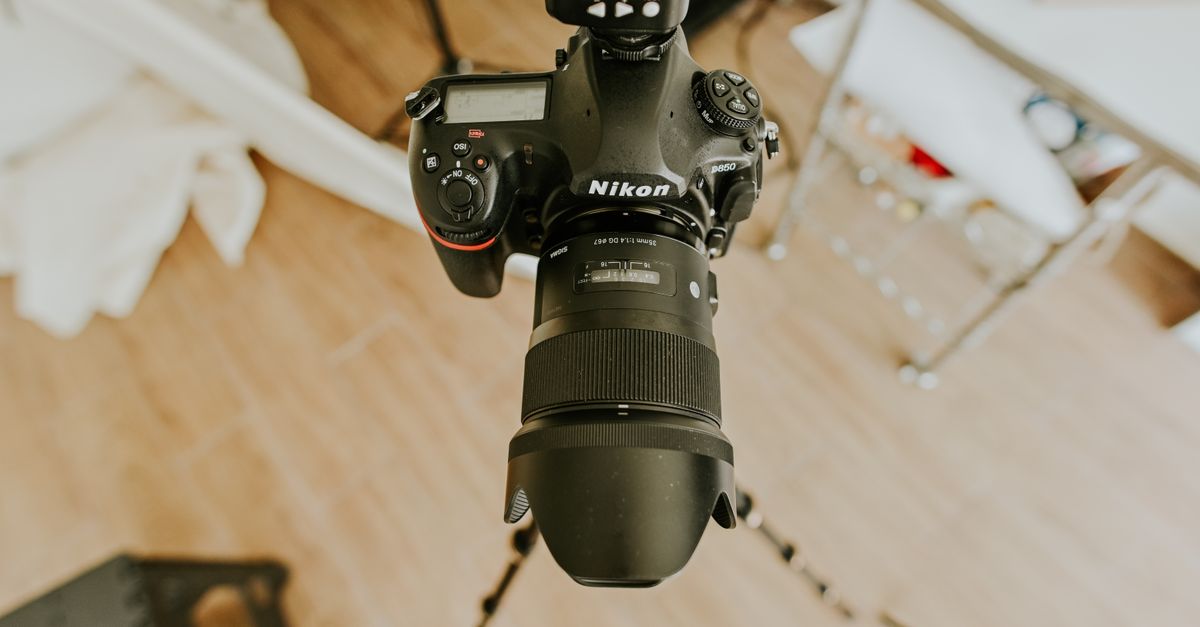
The Gear You Actually Need
Classic HDR has a short, non-negotiable kit list, because you are shooting several frames of the exact same scene and they must line up perfectly.
- A camera with manual or aperture-priority mode and exposure bracketing (most mirrorless and DSLR bodies, and some advanced phone apps).
- A wide-angle lens, roughly 16 to 24mm full-frame equivalent, to capture whole rooms without distortion.
- A sturdy tripod. This is the one item you cannot skip for true bracketing, because every frame must align.
- A remote shutter or the 2-second timer, so you are not nudging the camera when you press the button.
No lighting rig required, because the whole point of HDR is to use existing light across exposures. The tripod is the part beginners skip, then wonder why their merged photos look soft or ghosted, so do not skip it. (Unless you are on a phone, a different path covered below.)
HDR Real Estate Photography Settings
Here are the settings that produce clean, mergeable brackets. Everything stays identical between frames except brightness; lock down the rest.
- Mode: aperture priority or full manual, so aperture and ISO stay fixed across the bracket.
- Aperture: f/8 (sometimes f/9 to f/11), for sharpness across the whole room.
- ISO: 100, for the cleanest possible image with the least noise.
- White balance: set it manually, not auto, so colour does not shift between frames.
- Focus: set it once, then switch to manual focus so it does not re-focus between shots.
- Mirror lockup or a 2-second timer, to kill any vibration from the shutter or your finger.
Why auto white balance off matters: if the camera re-decides the colour on every frame, your merged photo gets weird colour blotches. Set it once, manually, and leave it; same for focus. The only thing that should change between brackets is the light.
Pro shortcut: if your camera has it, enable Auto Exposure Bracketing (AEB). It fires the whole bracket in one burst, which keeps the frames perfectly aligned and is far faster than dialling each exposure by hand.

Exposure Bracketing in the Field
Bracketing means taking the same shot at different exposures. For most interiors, three to five frames does the job. A common setup is three at -2, 0, and +2 EV: the dark one protects the windows, the bright one opens the shadows, the middle one anchors it. Very bright windows against very dark corners may need five frames at 1 EV steps for a smoother blend.
You have two ways to do it. Auto Exposure Bracketing (AEB) fires the whole set automatically on one press, faster and perfectly aligned. Manual bracketing means changing the shutter speed yourself between shots, full control but slower and it risks bumping the tripod. For real estate, AEB is almost always right: you shoot a lot of rooms, speed matters.
Three frames at minus two, zero, and plus two EV will handle the large majority of rooms. Save the five-frame brackets for the hard ones.
The one rule in the field: nothing can move between frames. A swaying curtain, a ceiling fan, a tree outside the window, all create "ghosting" when the frames merge. Shoot when the room is still, fans off.

Merging and Editing for a Natural Look
Once you have your brackets, you merge them in software. The three names you will hear most are Adobe Lightroom (Photo Merge to HDR, the simplest and most natural by default), Photomatix Pro (the long-time specialist, powerful but easy to overcook), and Aurora HDR. All three combine your frames into one high-range image, a step called tone mapping that fits that light onto a screen.
The part that separates pro work from amateur: pull the sliders back. The biggest mistake in HDR is leaving strength, clarity, and saturation cranked, which produces that gritty "HDR look" everyone recognises and nobody trusts. The best editing is invisible: aim for the room on its brightest, most honest day.
After the merge, finish with the basics: correct the white balance so the room reads neutral instead of orange, straighten leaning verticals, and nudge exposure so it is bright but not flat. Keep saturation realistic; greens should look like grass, not radioactive lawn. This finishing pass makes the difference, and it is the slowest part, often 10 to 15 minutes per photo.

Common HDR Mistakes (and How to Avoid Them)
Most bad HDR fails in a handful of predictable ways. Know them, avoid them.
- The cartoon look: over-cooked tone mapping with crushed contrast and neon colour. Fix: pull strength and saturation way back, aim for realistic.
- Ghosting: blurry doubles around anything that moved (curtains, fans, people, trees). Fix: shoot a still room, use your software's de-ghosting option.
- Halos: ugly glowing outlines around windows and rooflines. Fix: lower the tone-mapping strength and avoid extreme settings.
- Noise: grainy shadows, usually from a high ISO. Fix: shoot at ISO 100 and let the bright frame carry the shadow detail.
- Soft or misaligned frames: from a shaky tripod or handheld attempts. Fix: lock the tripod, use a timer or AEB burst.
Notice the pattern: almost every HDR problem traces back to too-aggressive editing or frames that did not line up. Restraint in the edit and a solid tripod solve most of them.

HDR vs Flash vs AI: Which Path Is Right for You
Bracketing is not the only way to balance a room, and for many listings not the fastest. The honest comparison:
HDR bracketing gives you maximum control and the most natural high-end result, and it is the professional standard. The cost is time and gear: tripod, multiple frames per room, and a merge-and-edit workflow afterward. Worth it for trophy properties and pros.
Flash (lighting a room with off-camera strobes) produces clean, low-noise photos with great colour and no ghosting, and many top photographers swear by it. The trade-off is a steep learning curve and a bag of gear: a pro technique, not a quick DIY win.
AI / one-click enhancement is the realistic path for agents and DIY sellers shooting a single photo on a phone. You shoot one frame, let your phone's built-in HDR do its thing, then run the result through software that brightens it, balances the colour, and straightens the walls. You get the "HDR look" without a tripod, bracketing, or Lightroom.
Is auto HDR good enough on its own? Modern phone HDR (Apple's Smart HDR, Google's HDR+) is impressive and handles tricky windows far better than a few years ago. Apple's own guidance confirms the iPhone takes several photos at different exposures and blends them automatically, getting you most of the way there. Where it falls short is the finish: phone HDR rarely nails neutral white balance, does not straighten leaning walls, and can leave rooms flat. That finish, neutral colour, straight walls, a room with depth, is what a dedicated enhancement step adds.
For a standard listing on a phone, single-exposure plus a one-click finish gets you 90 percent of the bracketing result at a fraction of the effort.

The Phone and DIY Path: Faking the Balanced Look on a Budget
You do not own a tripod and you are not merging five frames in Photomatix between viewings, and that is fine. Here is how to get the balanced look on a phone.
First, lean on your phone's HDR. On a recent iPhone or Android, leave it on (it is usually automatic) and it blends exposures for you in a single tap, no tripod needed. Tap the brightest part of the scene to set exposure, then drag the brightness down slightly so the windows keep their view. Open every curtain, turn off mismatched warm bulbs, and shoot when the room is bright. For the full handheld method, see our step-by-step guide to taking real estate photos with your iPhone.
Then finish the shot. Single-exposure phone HDR gets the dynamic range close, but leaves colour and verticals on the table. Brighten it a touch, neutralise the white balance, straighten the walls. By hand that is fiddly; with an AI enhancer, one click.
Here is the honest decision checklist:
- Standard listing, shot on a phone, needs to go live this week: phone HDR plus a one-click enhancement finish. This covers the large majority of everyday listings.
- Premium or luxury property where every detail sells: hire a pro who brackets or uses flash. The extra cost is justified by the price point.
- You shoot listings full-time and want full control: learn proper HDR bracketing or flash, and own the workflow.
- Difficult light (huge bright windows against very dark rooms) on a budget: shoot the best single exposure you can, expose to protect the windows, then recover the shadows in editing.
Match the effort to the property: a two-bed rental does not need five frames; a waterfront estate might.

The Shortcut: One-Click HDR With Sublim.it
On the phone-plus-finish path, this is where the HDR actually happens. You shoot one ordinary photo with your phone's HDR on, and Sublim does the rest in a single pass: it applies a balanced HDR finish that evens out the bright window and the dark corners, brightens the room with neutral daylight, clears the orange cast from indoor bulbs, straightens leaning verticals, corrects colour across the set, and on exteriors evens a dull grey sky to a natural blue and revives the lawn. No tripod, no bracketing, no merging software. Upload a set, get listing-ready photos in seconds.
Done well, HDR is invisible, and that is exactly the goal: Sublim works on the real room you photographed and keeps it real. Every piece of furniture and every object stays exactly where it is, so the only part that is on you is the basics, declutter the room and frame a clean shot before you upload. Get those right and the one-click finish closes the gap to the pro look, no tripod and no merge steps.