Most rooms look fine in person and somehow look like a cave online. Same room, same furniture, a phone in between, and suddenly the kitchen could double as a parking garage. The good news: shooting your own place well is a repeatable process, not a talent.
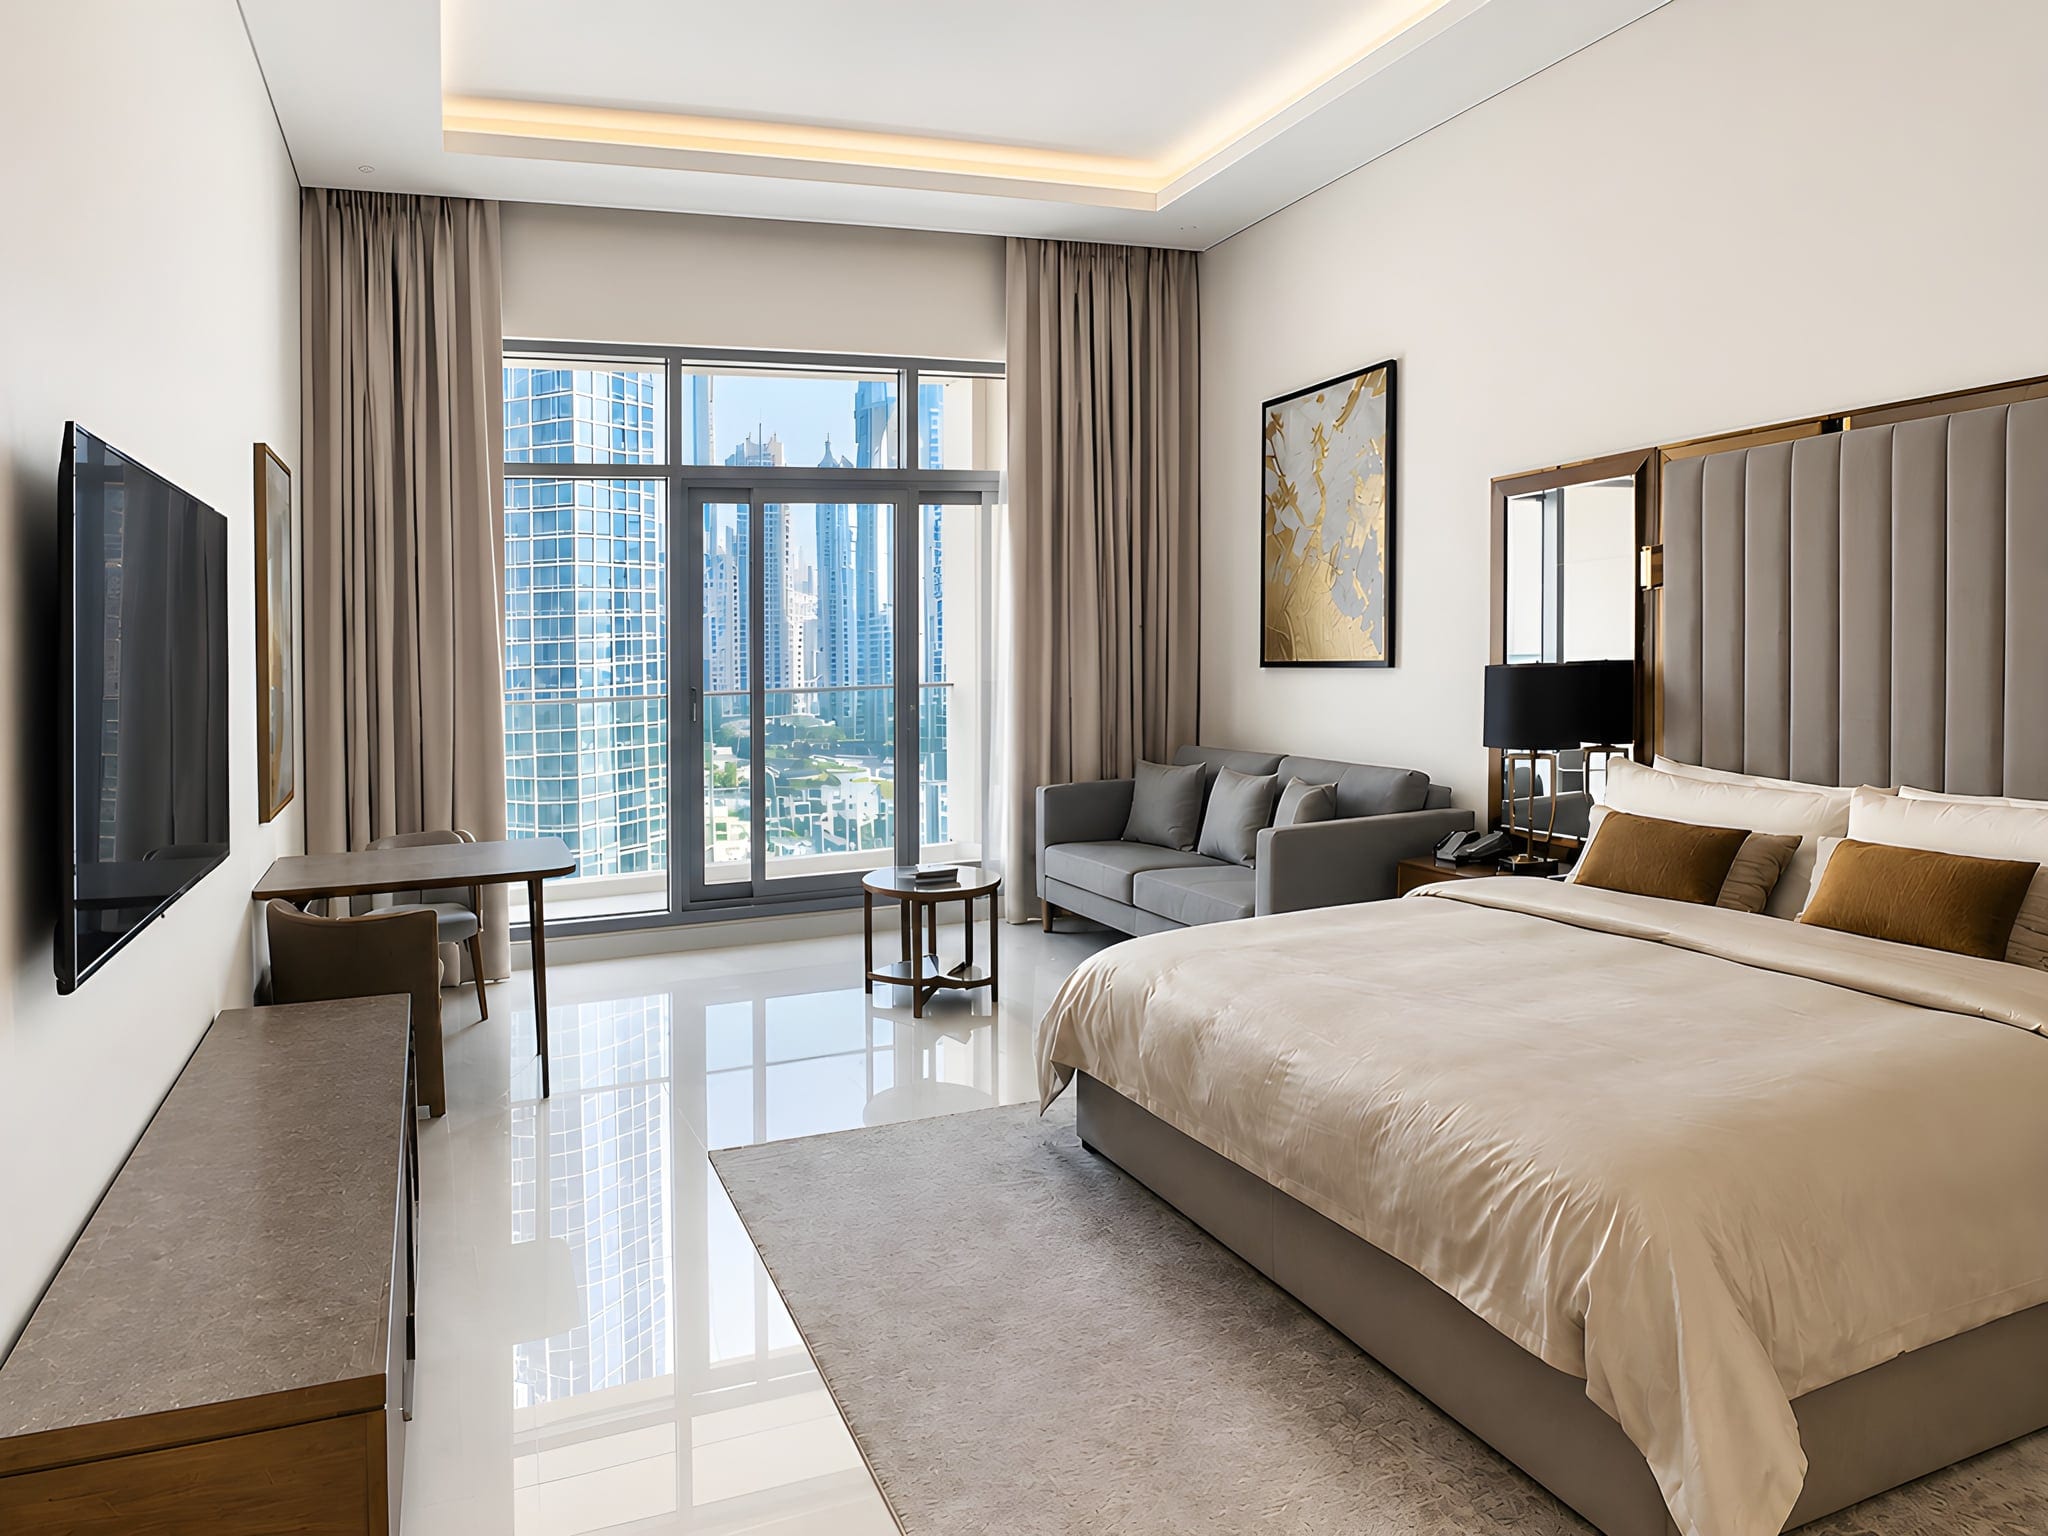
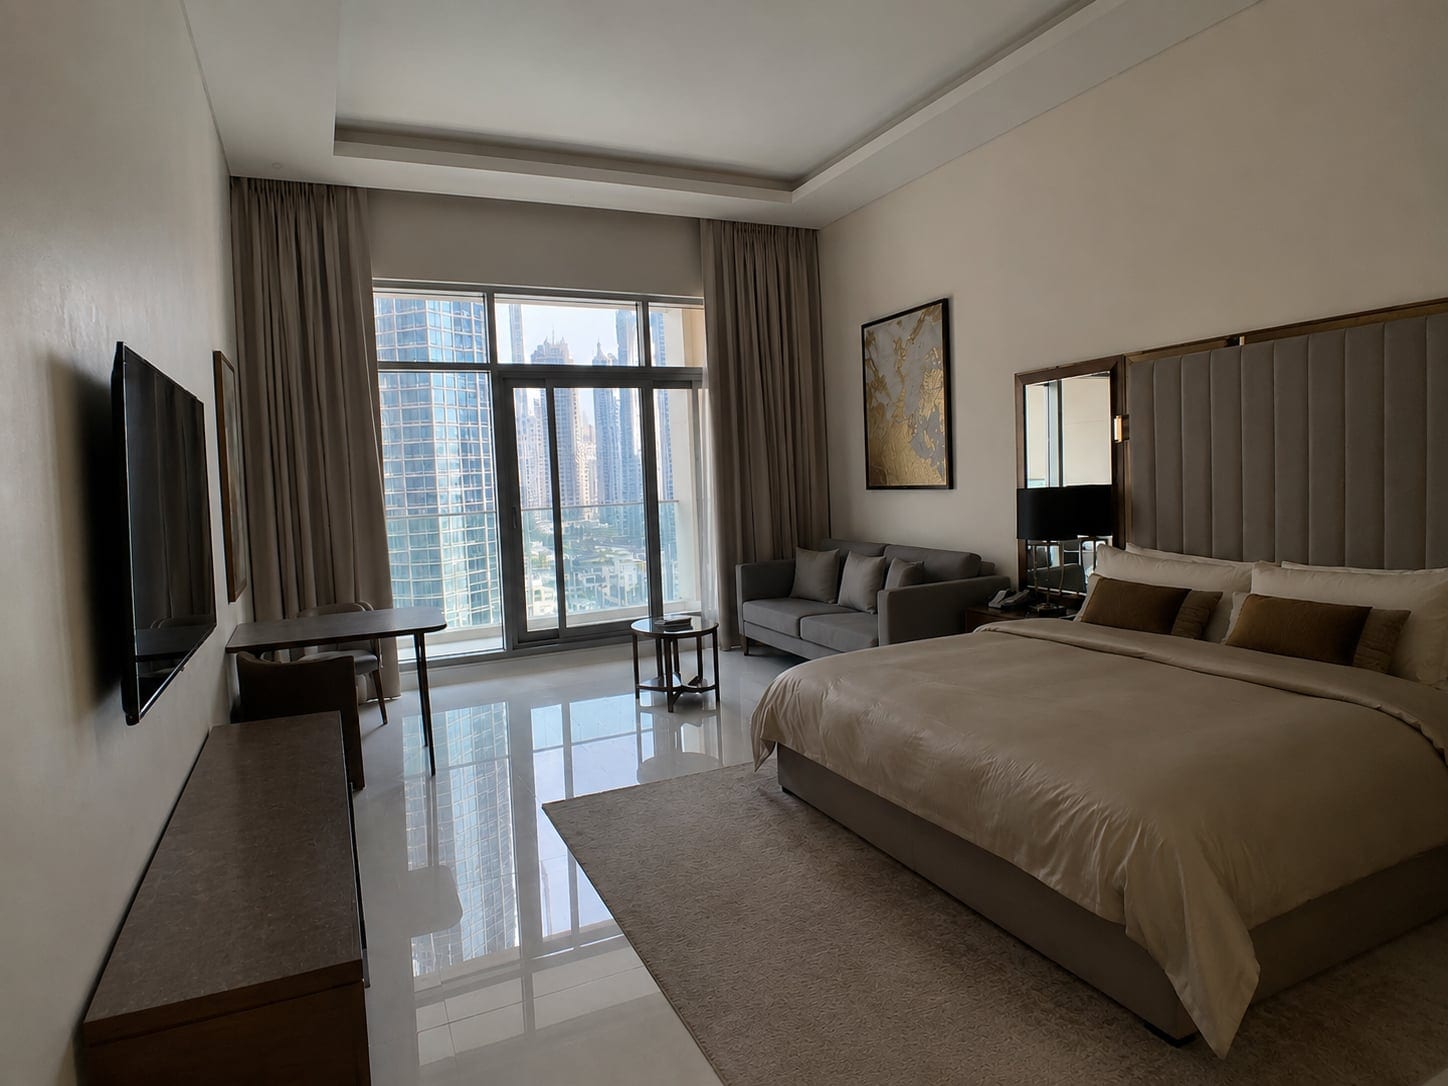
Interior real estate photography is the craft of shooting a listing's rooms so they read bright, spacious and accurate online. The formula: declutter first, shoot in daylight with every light on, stand in a corner at chest height, keep the phone level so walls stay straight, then balance the whole set with one edit. That is the job.
This guide is for the people who own the result: agents, FSBO sellers, and Airbnb or short-term-rental hosts shooting their own listing. We focus on what is genuinely different about interiors: the brightness gap between a window and the room, mixed warm-and-cool light, and making a tight room read bigger. For the broader fundamentals, our real estate photography tips cover the shared basics.
Why interior photos are harder than they look
Outside, the light is even and the subject is one building. Inside, you fight physics in every frame: a window can be a hundred times brighter than the wall beside it, household bulbs throw orange while daylight throws blue, and rooms are small enough that walls lean the second you tilt the phone. So interior real estate photos often come out dark, orange and crooked all at once, because your phone averages the light and either exposes for the window (room goes dark) or for the room (window blows out).
The stakes are real. Buyers browse the photos long before they read the price, and the count matters: Zillow research found homes with fewer than nine photos are about 20 percent less likely to sell within sixty days than homes with 22 to 27. A dim, orange living room quietly loses showings.

Prep and stage each room before you lift the phone
Decluttering is physical work, not a software trick. No tool tidies a room honestly, so this is on you, and it is the highest-return five minutes in the shoot: a clear room photographs as a bigger, calmer one. Run this pass first:
- Declutter hard. Clear every countertop in the kitchen and bathrooms; empty surfaces photograph as space.
- Depersonalise. Take down family photos, fridge magnets and sticky notes so buyers can picture their own life there.
- Hide the eyesores: cables, chargers, trash and recycling bins, the cat tower, the drying rack.
- Make the beds, fluff the cushions, square the rugs, put toilet lids down and hang fresh towels.
- Open every blind and curtain, and pull anything that does not sell the room out of frame.
Work room by room so you never carry clutter from one shot into the next. For a deeper prep list before you list, see getting your house ready to sell.
A decluttered, well-lit room does most of the work that editing later gets credit for.
The gear you actually need (a phone is enough)
You do not need a $2,000 camera to shoot good interior real estate photos; a modern phone, decent light and a clean finish beat an expensive camera used badly. The short list: a recent smartphone (iPhone 11 or newer, or a comparable Android) whose built-in wide lens captures a whole room, a cheap mini tripod for dim rooms where handheld might blur, and a microfiber cloth to wipe the lens, the single most ignored piece of kit.
Skip the DSLR, the fisheye, the drone and the external flash; natural light wins almost every time indoors. For the exact device setup, our how to take real estate photos with iphone guide has the phone-specific steps.

Lighting: daylight first, every bulb on, mind the color
Light is the single biggest difference between an amateur interior and a professional one, and indoors it is the trickiest. Two rules cover most of it.
First, open every curtain and blind, then turn on all the interior lights too. Daylight gives you a bright, flattering exposure; the bulbs fill the shadows and make the home feel lived in. Let daylight do the heavy lifting, not lamps.
Second, watch the color of your light. Bright and neutral beats warm and orange: buyers read orange as "dingy" and dated, while clean daylight reads as "fresh and cared for". The trap is mixed color temperature, where warm bulbs and cool daylight in one room make a muddy orange-green cast, so switch off the worst-clashing overhead. If a room still comes out warm, do not reshoot; white balance is the easiest thing to fix afterward.
Pro shortcut: if a room only has warm bulbs, shoot mid-morning with the blinds wide open and the warmest overhead off. Daylight sets the color, the lamps fill the corners.

Handle the window-vs-room brightness gap
This is the interior problem. Your eyes see the bright window and the darker room at once; your phone picks one and the other goes wrong. A few habits tame it:
- Leave HDR on (iPhone: it is the default; Android: turn on HDR or Auto). It captures the bright window and the darker room in one frame.
- Tap a mid-bright part of the room, then drag the exposure slider down a touch so the window keeps some detail.
- Shoot when the sun is not blasting straight through the glass; soft, indirect daylight narrows the gap.
- For the worst rooms, take one frame exposed for the room and one for the window, then blend them. That is manual exposure bracketing.
Bracketing and blending two exposures is the classic pro move for blown-out windows, and our hdr real estate photography guide walks through that workflow step by step. One caveat: an AI enhancer cannot recover a window that is already pure white in the file. If the highlight is gone, the data is gone, so you fix it in-camera, not after.

Composition: corners, chest height, dead-straight verticals
Three small habits turn a snapshot into a listing photo, and they matter more indoors than anywhere.
Nearly every room in a professional listing is shot from a corner. Stand in a corner, not the doorway. Shooting down the middle makes a room look like a narrow hallway, while a corner shows two or three walls at once, which reads as depth. An ultra-wide lens from a corner is the best trick for making a small room look bigger.
Hold the phone at chest height, not eye level. Eye level shrinks the floor and the ceiling looms; chest or waist height shows more floor, which the brain reads as more room. And keep the phone perfectly vertical, because the moment you tilt up or down, the walls lean inward like a funhouse. Straight verticals are the cheapest pro upgrade there is, so use the gridlines and the level overlay.
Pro shortcut: corner, chest height, phone dead level. Memorise those three and every interior shot jumps a grade.

Best time of day to shoot interiors
For interiors, the rule flips from exteriors: you want even daylight bouncing in, not dramatic golden-hour rays. Shoot mid-morning to mid-afternoon, when daylight is bright and high enough to fill the rooms without spearing through the windows.
An overcast day is your friend indoors: soft, cloudy light kills hard shadows and shrinks the window-vs-room brightness gap, so the whole house photographs evenly. Bright midday sun, by contrast, blasts hot rectangles across the floor and makes windows clip. Save twilight and golden hour for exterior shots, and shoot sun-facing rooms in the morning, the rest in the afternoon.

Room-by-room order and how many photos to upload
A shooting order that works inside: main living space, kitchen, primary bedroom, other bedrooms, bathrooms, then any standout features (the fireplace, the walk-in closet, the view from a window). Photograph rooms in listing order and the gallery tells a natural story while you edit faster.
For each room, take one wide establishing shot from the corner, then two or three detail shots: the kitchen island, the soaking tub, the closet built-ins. Give the most frames to the rooms buyers care about most: kitchen, living room, primary bedroom and bathrooms. Aim for roughly 20 to 30 photos for a typical home. Showing every room reassures buyers; padding with near-duplicates does not, and Zillow's photo-count finding above tops out around that range.

Editing: the standard way and the fast way
Almost every interior photo needs a light edit, and the best editing is invisible: a room should look like its best real self, not a video-game render. The manual route (Lightroom, Photoshop or Photomatix) runs 10 to 15 minutes per photo, which is why most agents and sellers skip it and post the dark, orange originals.
Here is the line that protects your trust with buyers: enhance, don't deceive. Brightening, color-correcting and straightening walls is fair game. Removing a permanent feature, swapping in a fake sky, or virtually adding furniture is not, and many MLS rules require you to disclose manipulation.

The one-click finish for your interior set
If 15 minutes a photo in Lightroom is never going to happen, this is your part. AI photo enhancement does the editing math automatically, in seconds, with no tripod or Photoshop skills required.
Consistency is what ties the set together: a listing where every room shares the same clean, balanced look feels professional, while a mix of warm, cold, dark and bright interiors feels chaotic. Most buyers will not consciously register the consistency; they will just feel the home looks more cared-for and worth more. That is what Sublim.it does: upload your phone shots and they come back brightened, balanced and color-corrected, ready to list.
We have to be straight about what Sublim does, because trust is the entire point. It enhances the real room: it brightens dark interiors, balances the light including bright windows, applies a clean HDR balance, fixes warm-vs-cool white balance, straightens verticals, corrects color, and outside it evens a dull sky and greens the grass. What it will not do is tidy or stage for you: it keeps your furniture and objects exactly as they are, it does not recompose your shot. Get the framing and tidying right in-camera, and Sublim handles the finish.
If you are selling without an agent, the photos are only one piece, so see how do you sell your own house for the full FSBO playbook.
The 60-second interior pre-shoot checklist
Run this before you shoot any room:
- Blinds open, every interior light on.
- Counters and floors cleared, cords and bins hidden, beds made.
- Gridlines on, HDR on, landscape on the wide lens.
- Corner, chest height, phone perfectly level.
- One wide shot plus two or three detail shots per room.
- Run the set through one consistent finish before you publish.